My First Quilt – Part 6: Finished! Finally.

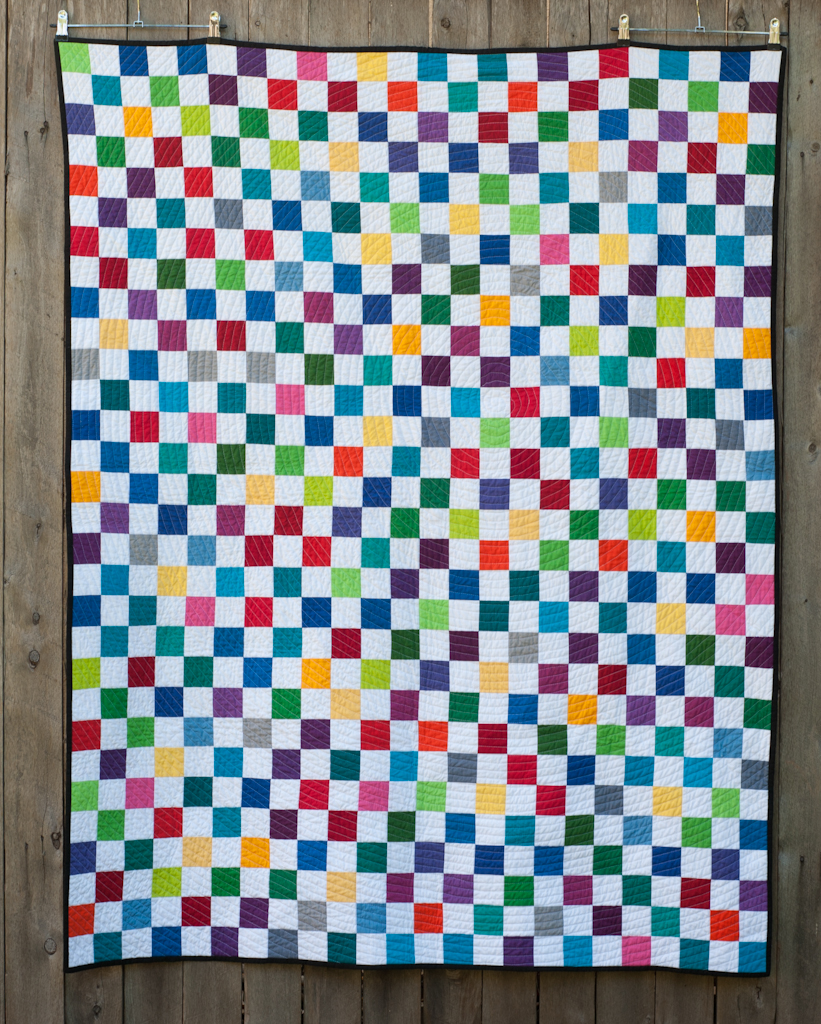
Well she’s all done.

I had originally picked out a white-on-black spot for my binding, but after choosing the printed backing, rather than the pieced back with solids I was planning, it was all a bit too busy. Instead I went with a solid black binding to frame the quilt. There’s no way I could have settled on a single colour and I think the binding also ties in the bits of black from the backing.

Rainbow- Snapshots Finished

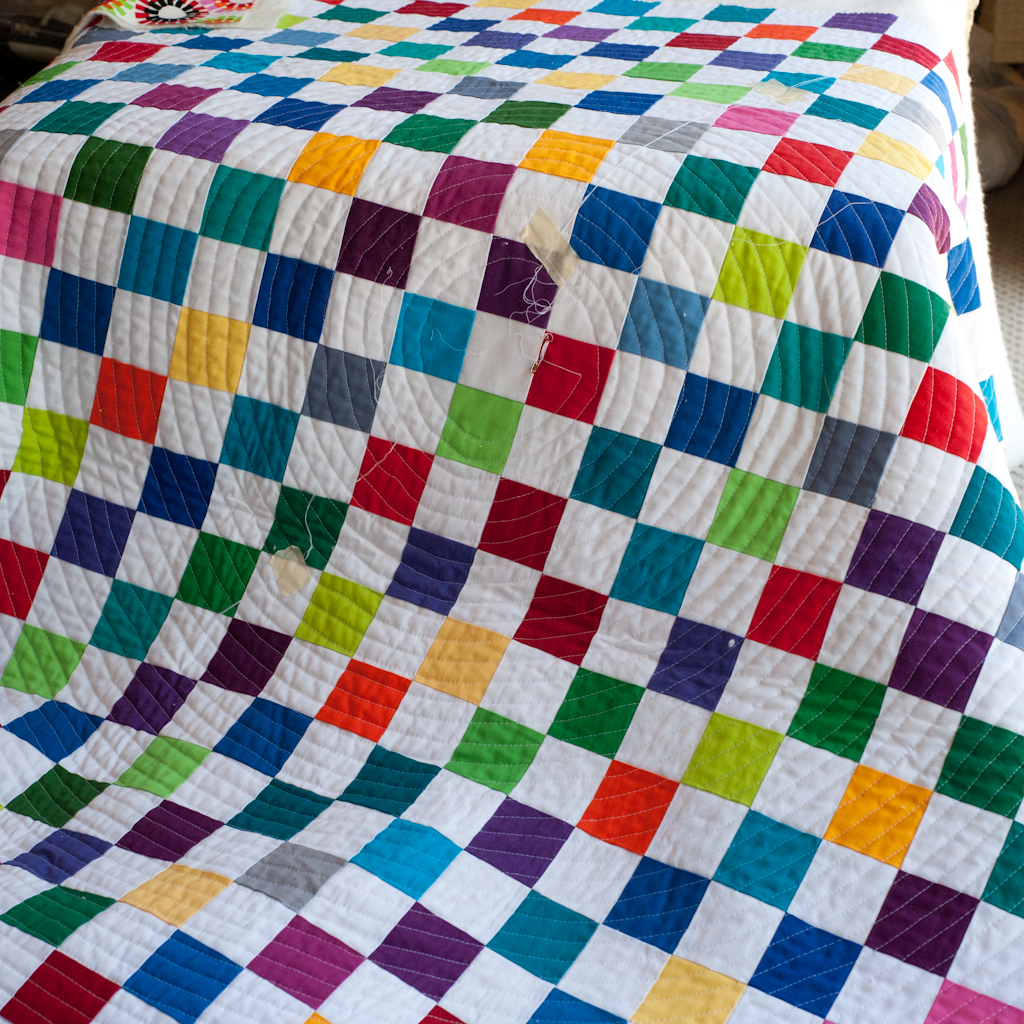
I’m so happy with how the spiral quilting turned out. The free motion part in the middle is a bit wonky, but that just adds character, right?

Rainbow- Snapshots Quilting

The print on the back has worked so well in balancing the front, the circles and squares are a great contrast and while the colours are all brights I found the top seemed to be more cool colours, where as the back is beautiful and warm.

Rainbow- Snapshots FinishedRainbow- Snapshots Backing

I also decided to hand embroider the label for this quilt. I just couldn’t find a great pen/marker/printing solution that looked like it would work and remain legible through a (hopefully) long life. I was reading a lot of blog posts about labeling quilts and checking out different labels on Flickr so decided I wanted to make this a good one and spent that bit of extra time creating my label.

Rainbow- Snapshots Label

So there you have it, my first quilt, finished by the end of the year which was my goal. If you missed in one of the earlier posts, this quilt is based on Snapshots by Elizabeth Hartman from her book The Practical Guide to Patchwork: New Basics for the Modern Quiltmaker.

I’ve made a small baby quilt since, and have also started on my next bigger quilt project.

Rainbow- Snapshots Folded

My First Quilt – Part 5: Quilting – Round and round and round she goes

I can’t claim the idea of concentric circle quilting as my own. It was suggested to me as a way of breaking out of the blockiness of all those squares. I was shown some gorgeous examples and then despite finding out just how hard it was going to be during a machine quilting class, I just couldn’t get the idea out of my head. Nothing else I could think of seemed quite right. Really, I probably should have just followed the lines, maybe quilting a 1/4 inch either side of the seams, but no, it had to be circles.

 Spiral Quilting

To quilt circles you basically have to slowly turn your item around 360 degrees under the needle as you sew. If you have a circle to follow, either as part of the project itself, or by drawing your own guideline then you can use that for the first round and then use either the side of you foot or a guide on the previous line to keep the spacing even.

I tried out the idea on my Sashiko Sampler Scissor Pouch a little while back which was a really good practice run. At that size it was really easy to move through the machine, however I already noticed how many stops & starts there were, and how many thread ends I would have to go back and hide afterwards.

Spiral Quilting

On the larger quilt I decided to quilt it as a spiral instead. I traced around a small side plate to start just off centre of the middle. The beginning was quite hard as you’re turning a really tight circle under the walking foot and there’s a lot of long quilt edges to push around but as I moved out it gradually got easier. The middle was left empty as it would have been near impossible do to spiral that tightly, then I came back to free motion quilt it at the end.

I left this all set up on my machine so that I could just sit down and do a little bit at a time as I could and it worked! I had the whole top quilted in just over a week doing a bit each night.

Spoiler alert: The quilt is finished! Final post in this series coming up shortly. Should be a good note to end the year on.

My First Quilt – Part 4: Quilt Sandwich, Yum!

Despite a lack of updates here, my quilt has actually progressed quite well. It’s *this* close to being finished which means I’m on track to meet my goal of “finish a quilt this year”. Really aimed high with that one didn’t I? In January it seemed achievable for a first timer and I can definitely say that were it not for the Wollongong Modern Quilt Guild and all the lovely ladies & our visitors at our monthly sew days who have given advice and encouragement, I may not have got this far.

So, time for a bit of catchup…

I picked up a stunning print from Kelani Fabric at the Sydney Craft & Quilt Fair. It’s called Fiesta Firecracker, from the Folklorica collection by Alexander Henry. I thought it would work well as it took similar bright colours from the front but used concentric circles which would mimic the quilting that I was planning. It also helped that it was a nice busy print on a white base so my rookie quilting wouldn’t show too much.

Back at our July Sew Day (yes that long ago) I took along my finished quilt top, the batting, and my backing fabric to prepare my quilt sandwich. I needed to join the backing first to make it wide enough (those long seams are scary!). When that was all ready I got some help from Rachael to tape it out taut on the floor and then we smoothed the batting out on top. Amy, of badskirt fame, helped with clever ideas for getting my top centred and then we pinned… and pinned some more. Huge thanks go out to Rachael, Diane & Jo who helped with the pinning, and came to the rescue with extra pins.

Rainbow Snapshots - Basting

One delicious sandwich all ready for quilting.