Lucky Stars BOM: January

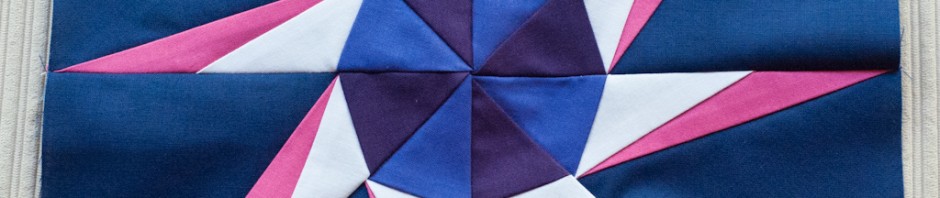
January block is done! I found this block made from 4 squares instead of the 8 triangles in the practice block seemed to be more straight forward. The blocks probably took a little longer but only having 3 seams to sew to turn it into a complete block made it super quick.

Lucky Stars BOM - January

I’m attempting to get a bit designery (that’s a technical term) with these blocks by mocking them up in Adobe Illustrator and trying out my colour combos first. It seems to be working in that my original plans for the colour placement within the blocks look ok, but with a bit of swapping and changing around I’ve found a variation that I think achieves what I’m going for just that little bit more. Sometimes along the way I discover a way to emphasise different patterns in the block than I orginally saw.

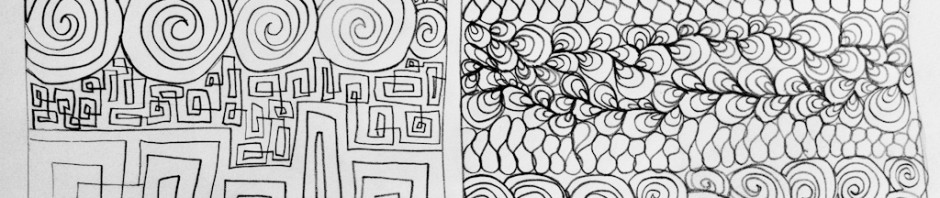
You’ve probably heard of Photoshop, I use that quite a bit for my work. Illustrator is a kind of sister program to Photoshop that allows you to draw, manipulate and resize lines and shapes where as Photoshop is more like painting (and photo editing). I’ve been wanting to expand my skills in Illustrator, so far my experience is limited to making small edits to other peoples work. My idea of tracing, drawing or designing quilt blocks seemed like a good fit for Illustrator so with that in mind I’ve been trying a few tutorials. Kmac Quilts has a small series including some good tips on setting up grids based on your common quilt sizes. I also found a handy tutorial from Vector Diary on how to outline and colour in your quilt.

The below images show how I originally thought I would place the colours (left) and another variation that I really liked which I think gave emphasis to different parts of the block (right). What I ultimately wanted was a kind of exploding starburst effect so what you see in the block above was what I ultimately went for.

Lucky Stars BOM January Block - Original Idea
Lucky Stars BOM January Block - Alternate Design

Lucky Stars BOM: Practice Block

I’ve been a bit slow to start but here’s my first block for the Lucky Stars Block of the Month with Elizabeth Dackson of Don’t Call Me Betsy. This is just the practice block released back at the end of December and was my first attempt at foundation paper piecing.

Lucky Stars BOM - Practice Block

So far I’m really loving this technique! I had a vague understanding of how it worked but had never seen it done. Someone posted a link to the video below in our Flickr discussion groups for the Lucky Stars BOM Club. Even though Elixabeth has supplied us with great instructions and templates, watching this video and just seeing it done once was huge help and the steps have been easy to follow.

I’ve decided to go with all solids for my blocks, brights on a navy blue background and in each block I’ll make a feature of one of the elements in white. Time to get cracking on the January and then February blocks.

Craftsy Class Sketches

I’ve recently discovered Craftsy, an online community for people who like to make things. It’s main concept is to provide online video classes that cover quilting, knitting, crochet, cake decorating, jewellery, paper crafts and more.

After taking a look at a couple of the free class videos, and being really impressed with the concept and format, I took the plunge and opted to try a paid class – Machine Quilting Negative Space with Angela Walters. Below are some of my quilty sketches from Lesson 2 of the class.

Craftsy Quilting Class - Lesson 2 Sketches

While you can learn a lot from YouTube, these videos are professionally filmed, follow structured class formats and provide supporting class materials. You need an Internet connection to watch the videos through your browser, or the iPhone or iPad apps, but you can watch the videos as often as you like, pause, rewind, watch something over and over until you’re ready to move on, and even save notes any any point along in the video.

The community site lets you create a profile, post progress updates, and best of all, ask question and interact with your other ‘classmates’ and your expert teacher! In addition to classes you can participate in workshops (craft-alongs) and upload projects (which may or may not be related to the classes). If that wasn’t enough, there’s an online store for fabric, yarn and other class-related supplies, and you can also purchase patterns by other Craftsy users.

There are free classes to try on basic sewing, bag making, a patchwork block-of-the-month and other starter techniques & small projects. I’d definitely recommend giving one a go just to see what it’s all about. It doesn’t matter if you don’t complete the whole class, they’re a good taster for the format and flow of classes if something else interests you.

There are a variety of paid classes that range between approximately $15 – $50. I have worked out that by purchasing classes via the iPhone or iPad app they’re processed as in-app purchases which means you can use iTunes credit (from vouchers or linked up to a card).

So what are you waiting for, go try a Craftsy class to learn & make something new!

A Baby Quilt in Record Time

Baby Boy Quilt

This quilt started with the Marine print by Dan Stiles for Birch Fabrics, I’d been thinking about using the strips but didn’t really have a plan or purpose. Enter a self-imposed crazy deadline for a baby boy quilt and I had the four solids, backing/binding fabric & matching threads picked out in my lunch break. The piecing and quilting were kept really simple, not just for speed but it’s left the quilt nice and soft.

I wish I had some better photos to share but I was only able to snap a few as I was rushing out the door with this quilt, which I’d put the final stitches in minutes before. I didn’t think to change the camera lens and then the handful of front-on pictures were accidentally deleted by the guy who warned me only minutes before not to do just that… Oh well at least I have a couple photos.

Baby Boy Quilt

My first quilt took a year from start to finish. So how long did the second one take?

Five nights. No really! How’s that for a productivity boost.

I certainly didn’t plan it that way, but that’s how long I had between hearing that a friend’s 12 week old baby had been in hospital, and when we’d be seeing his Dad next, just before Christmas. Thankfully he’s ok and back at home, but I thought a bright and fun quilt might help provide some comfort and cheer for the family.

It turns out I stuffed around a lot making my first quilt, but I learned a lot to. This time, I wish I’d thought to trim the batting and then fold over the excess backing as the binding to machine stitch, but I did the binding the standard (long) way. I’d like to learn to do machine binding for these types of quick, heavy use quilts. I did notice my seams were much straighter and more even this time around so that’s a win.