Category Archives: finishes

Isaac’s Quilt

About time I made another quilt… and shared it!

This quilt was made for my little buddy Isaac. His Dad has been a work colleague and friend for nearly 10 years, he’s a big fan of natural fibers and loves the beach and gardening, which inspired the colours and prints.

When I heard last year that a bubba was on the way I knew I had to make a quilt. I love plus blocks for baby quilts and tried sketching a few options before settling on this one and working out the dimensions. The quilt finishes at 40″ square with each block at 10″ square.

Isaac's Quilt

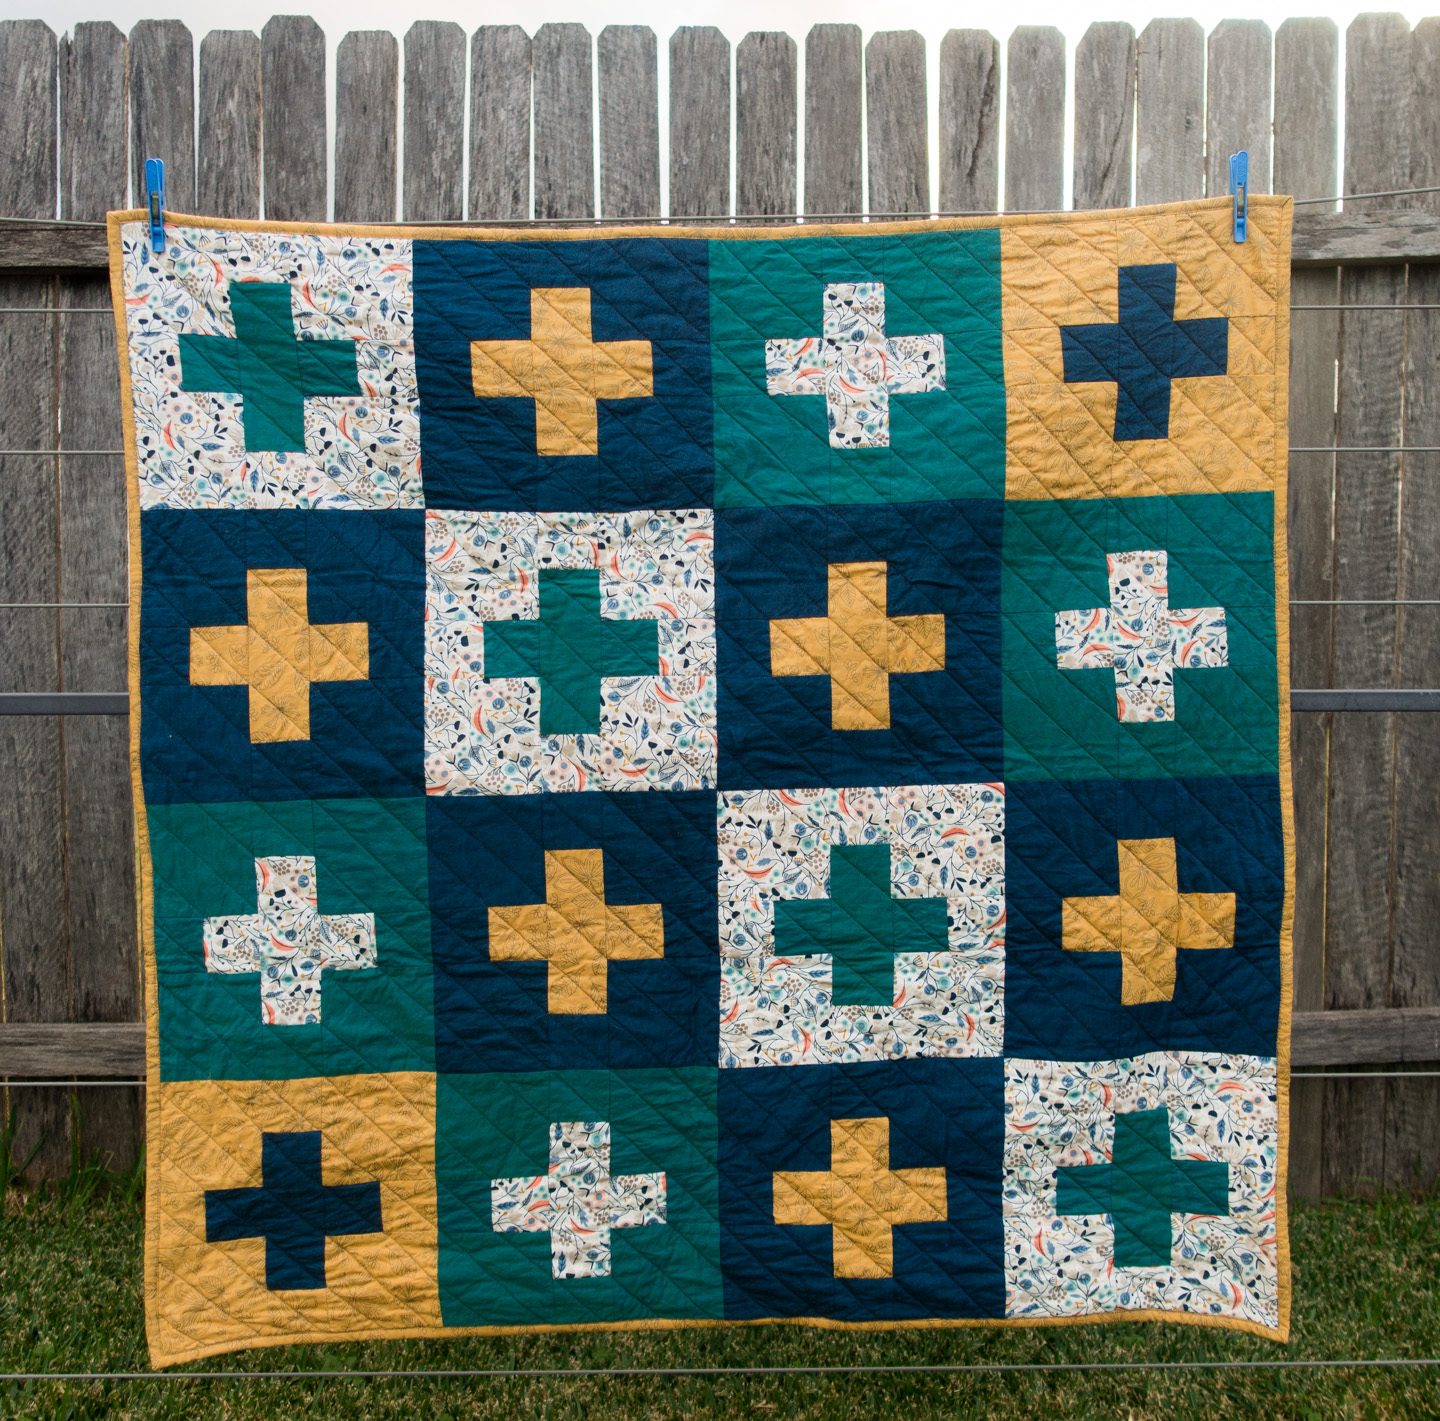
The fabrics, batting and even the thread are all 100% cotton. The blue and green are cross weaves that have a great shimmer from various angles. The sandy yellow has a grey metallic print with a botanical theme, similar to the multi colour on white. All of the fabrics and cotton batting were purchased from Spotlight.

Isaac's Quilt - Detail

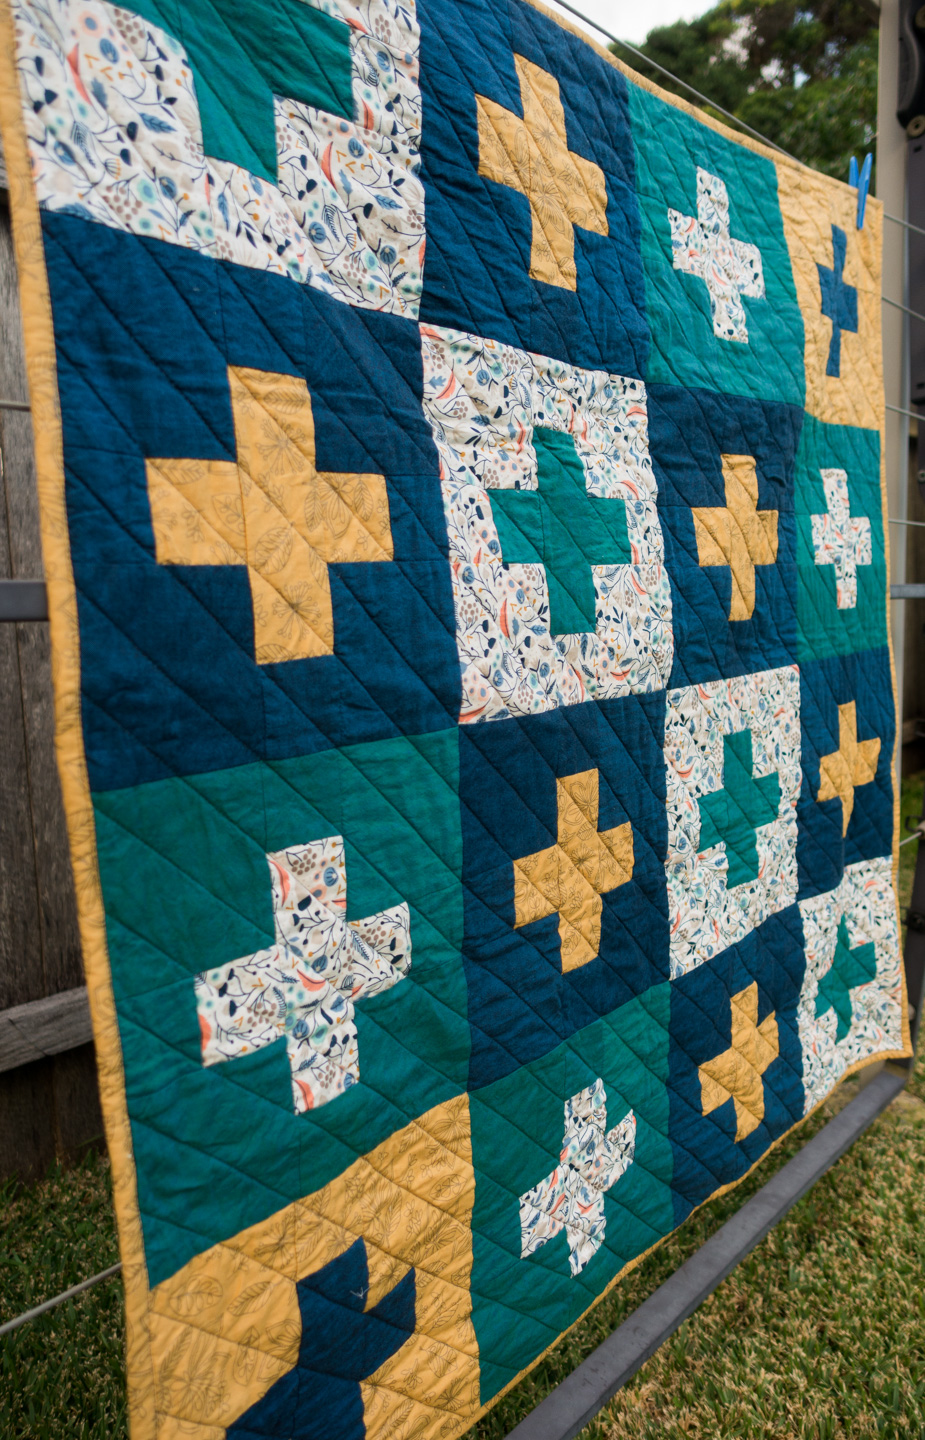
I originally intended to create a crosshatch grid with the quilting but after completing the diagonal lines in one direction it was just so lovely and soft so I decided to leave it at that. I used my favourite Aurifil 50wt  cotton thread in a medium grey (#1158) that sunk in and blended beautifully.

The binding was done by machine to withstand all the washing and dragging that baby quilts are subjected to, I’ve finally figured out just the right way to do it neatly, cutting the strips at 2 1/4″ and sewn to the back before folding over to the front and top stitching. The backing used left over strips from the front.

Isaac's Quilt - Back

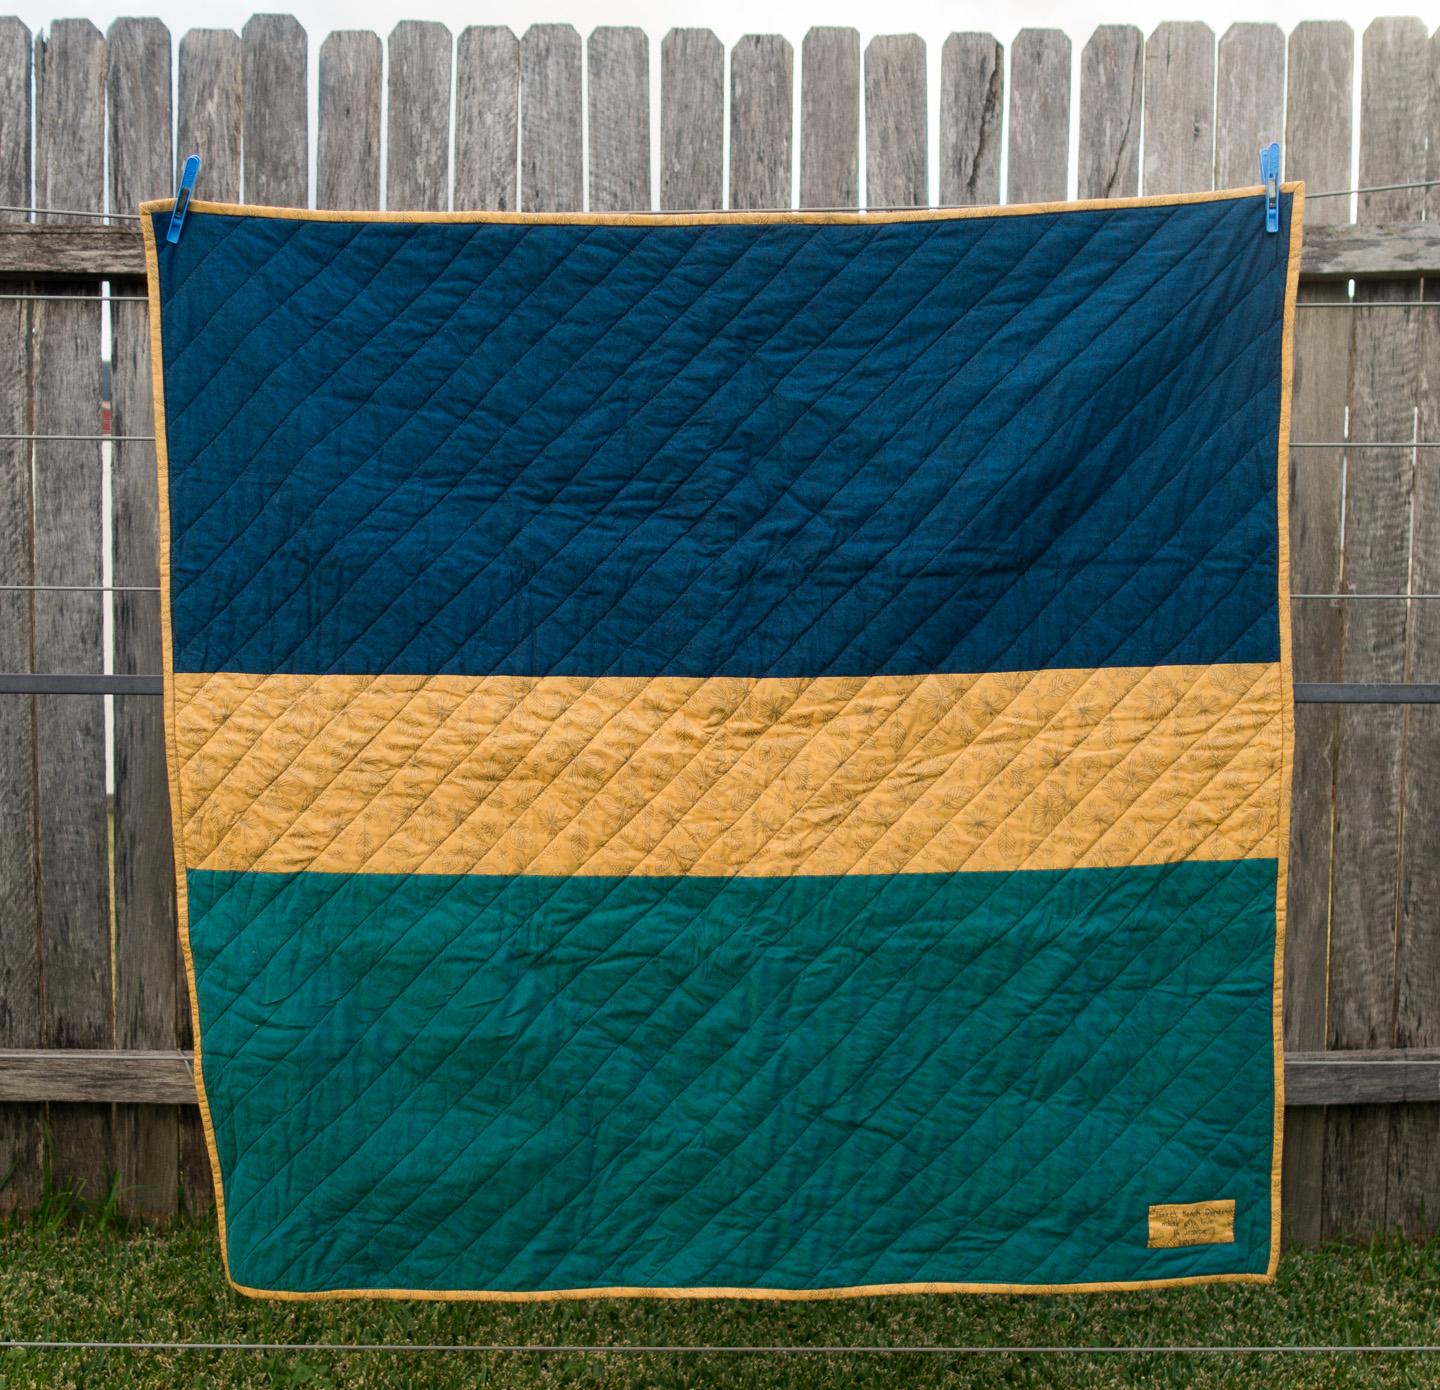
A little label to finish up and it’s now been gifted to Isaac with instructions to use it for picnics, cubbys, dragging around, and having lots of fun.

Nan’s Quilt

This quilt has been about 3 years in the making, I decided early on that I wanted it to be for my Nan who was delighted that I was sewing and quilting, I knew that she would appreciate the time and effort of a handmade gift.

Nan's Quilt

I’d worked on it in bits and pieces up until the end of 2015 when I learned my Nan’s health was deteriorating, she was 93 and still living in her own home up until then. I took the finished top, got it basted and started quilting it so that I could get it to her to cheer her up.

She was going to need to move into a nursing home for the extra level of care and also moving down closer to family (yet far from her home) and so I wanted her to have something to make her room feel like hers.

Nans Quilt

I kept working away when I could, another family emergency kept me out of my sewing room for weeks, but eventually I got the machine quilting finished, and I had to update the year on the label I’d already prepared. She was having a hard time settling in, when I went to visit I would take other quilts and sewn pouches to show her and she was so happy that ‘young people’ were still making things.

Nan's Quilt - Binding

I decided to put the binding on first before hand quilting, then Nan needed to go to hospital. She showed some improvement and returned to the nursing home, I started working on the binding, when I went to see her I told her I had something special on the way for her.  Shortly after her health went rapidly downhill again, before I could finish handstitching the binding I went to visit my Nan for what would be the final time.

When Nan passed away I put the quilt aside for a while, I needed a break from it, I felt terrible that it was still here, not finished.

Nan's Quilt - Detail

It had started as a couple charm packs of Moda’s Domestic Bliss by Liz Scott and a couple solid packs in Moda Bella Solids in Snow which were turned into piles of Half Square Triangles, but I quickly realised I didn’t have enough for a decent size quilt so I had to hunt around and eventually found 2 more charm packs of each for more HSTs. The backing print is by Joel Dewberry that matched the colours and style in Domestic Bliss perfectly. The leftovers from this quilt went in to making Heidi’s Quilt.

The layout was designed with the quilting in mind. I wanted the large diamond shapes and then worked out by offsetting them I’d have nice channels zig-zagging all the way down the quilt for long straight quilting lines following the seams. Inside the diamonds I used Angela Walters’ dot-to-dot technique from her Craftsy class to create more diamonds. All of the machine quilting used Aurifil 50w thread in 2110 Light Lemon. The print fabrics needed a little quilting so I decided to add hand stitches in Perle 8 thread in the middle of each triangle.

Nan's Quilt

Towards the end of 2016 I picked it back up again, my Mum had a tough year and I thought maybe the quilt would bring her some comfort, I had wanted her to have it after Nan anyway.

I didn’t stuff around this time, I worked on the hand quilting over a month or so to have it ready for Christmas, I nearly got there, but with only a row to go I gave the quilt to Mum anyway and finished off the last bit of quilting the week after Christmas.

The label reads:

Handmade with all the
love in the world
For Nanna
By Jessica
2016

Nan's Quilt - Back and Label

Tula Pink Scissors Cozy

When you get a pair of pretty scissors, they really need a pretty pouch.

My friend Rachael from WMQG made one of these scissors cozys for our secret santa swap and I loved it so she shared the link with me to the tutorial on s.o.t.a.k handmade.

scissor-cozy-2

Quilted Scissor Cozy

Shortly after I was lucky enough to get a pair of the gorgeous rainbow Tula Pink shears, but I didn’t want them clinking around with my other bits and pieces and getting scratched, so they haven’t left my sewing space.

Tula Pink Scissor Cozy

It’s only taken 9 months to make a scissor cozy for them, using Tula Pink fabric of course! These are two of my favourites – Raccoons in Blueberry and Hummingbird in Dusk from the Acacia line – I knew they were a great combo when I bought them nearly 3 years ago! I quilted the outer panels with my walking foot using Aurifil 50wt in Violet (2520).

Tula Pink Scissor Cozy

I’m going to have to make another soon, they’re a perfect fit for my Karen Kay Buckley scissors to!

Quilted Scissor Cozy

The pouch should fit most standard size shears, but the template would be easily adjustable for different size scissors. Two thumbs up from me, and the raccoons (with their creepy little people hands).

2016 Pouch Swap – Stash & Dash

My second swap for this year was the #2016pouchswap organised by Kristi @sugarndspice77

My partner mentioned ByAnnie’s Stash & Dash bag as pattern that they liked, I’d come across it a few times so decided to go for it.  I’ve enjoyed working with Soft & Stable when making the Social Tote so I was looking forward to using it in this project to.

2016 Zipper Pouch Swap - Stash & Dash Bag 2016 Zipper Pouch Swap - Stash & Dash Bag

Outside (left) with the wrap around strap and clear vinyl slip pocket. Inside (right) has 3 zippered mesh pockets, all stashed with goodies for my swap partner.

I picked out 4 Fat Quarters from a Tula Pink bundle, my partner’s favourite fabric, one each for the inside and outside main fabrics. I then chose to use the third for the zipper binding and wrap-around strap, and the fourth for the outside pocket & binding (these are often the same fabric but I couldn’t squeeze all the pieces out of one fat quarter).

Overall I enjoyed making this bag. It wasn’t too hard, quite a number of steps but taking it one at a time you get through it all. I’m pretty comfortable with zippers and binding but hadn’t sewn with mesh or vinyl before and my last attempts at machine binding were less than great. I made things a little more difficult for myself by having darks and lights and wanting to match my thread on both sides but I think it was worth it.

2016 Zipper Pouch Swap - Stash & Dash Bag
It’s hard to capture in photos but I found glitter flecked vinyl in Bunnings of all places (purchased off a roll, designated for table coverings I’d guess).

A sew-a-long on the ByAnnie blog was a big help if anything in the pattern wasn’t entirely clear. As with any new pattern I picked up a few handy hints as well, I was a bit skeptical about not ironing the binding in half, instead matching the raw edges to sew down but then when you fold it over you can smooth it out which I think really helped with sewing it down neatly – I’m stoked with how neat my machine binding turned out.

2016 Zipper Pouch Swap - Stash & Dash Bag

I’d be keen to make another one of these, they’d make a great travel sewing kit, make up or toiletries bag. I’d consider using vinyl for some of the inner pockets next time (handier for stashing little, skinny or sharp things). The slide clip came in a pack of two so I’m sure there will be at least one more.

Thankfully my partner loved the pouch! And here’s the cute boxy pouch I received in the swap, I’m even more keen to make a boxy pouch now.

Oh well, there hadn’t been a whole lot of quilt sewing happening these first few months of the year, but I’ve kept up with and really enjoyed my swaps. One more Q1 completed swap to share soon, and I’m currently in another due in July. Before that though there will finally  be more quilt progress to show real soon!

Getting back in the groove with a Social Tote

Earlier this year in June I was lucky to get a spot in a class to make the Social Tote, lead by Lorena Uriate and hosted at Material Obsession. I already owned the pattern by Carolyn Friedlander & Anna Graham (Noodlehead) but having read over it I wasn’t up to tackling it by myself. There are lots of additional photos on Carolyn Friedlander’s site to help explain the process if you’re not so lucky to have someone to show you through it.

Social Tote - a portable sewing caddy

The class was scheduled for a couple weeks after the Modern Quilt Show Australia held in May. I knew I’d be burnt out after the show and could use a kickstart to get back in to sewing & quilting so it was perfect timing.

Social Tote - a portable sewing caddy
Empty Social Tote

The inside configuration of the social tote, with and without all the fun stuff.

The social tote isn’t huge but is just the right size for carrying around your needles, threads, scissors and other small bits and pieces for a smaller project like EPP, or even just the little parts of a larger project. It sits on the arm of my lounge and acts as a thread catcher while I work and lets me easily move around. There are 2 smaller compartments and one larger compartment, perfect for a small kitten to climb into and then play with the built-in toys (clover clips & handles).

Social Tote - The perfect kitty basket with built in toys
Kitten Approved!

The pattern includes instructions for a pin cushion that fits perfectly into one of the smaller compartments. I like that it also helps hold the shape of the tote. One of the tips Lorena shared was that small scraps of batting are great for filling the pincushion and helping it hold its shape, I used a combination of batting scraps and polyfill for mine.

Social Tote Pincusion

Both sides of the pin cushion – my favourite print (the paint chips) and a perfectly sized wedge circle!

There are two little side pockets between the handles which are great for adding small feature fabrics. For my Social Tote I used various fabrics from the Paint line by Carrie Bloomston. The outside is one of my most favourite prints, I love the “Not Pink” colour combined with newsprint. The inner bottom uses the paint brushes print and I picked a few complementary colours & prints for other parts. I saved the paint chips for my pockets and one side of the pin cushion and the multi-colour woven print was a perfect binding to tie it all together.

Social Tote using Paint Fabrics by Carrie Bloomston of SUCH Designs

If I were to make another I would probably try to make it a little deeper and I do wonder if it would be possible to add some kind of closure or lid for it so that I could put it in with other supplies in a bag for sewing events outside home. I’m really happy I went through the process of making this tote and am especially grateful for Lorena’s expert guidance, it was a great day out and I’ll be keeping an eye out for more workshops up at Material Obsession in future.