It’s a wrap

Now that spring has sprung and we’ve had the occasional day of warm weather I’ve finally had the chance to wear my wrap skirt again.

The fabrics are from the Aviary 2 line in Granite by Joel Dewberry. The main skirt panels are Sparrows in Cavern, and the hems & ties use Damask in Granite. Not my usual colours (the yellow) so I would have looked straight past it without help from the Kelani Fabric stall at the Quilt and Craft Fair last year. The skirt pattern is The Versatile Wrap by Toni of Make It Perfect, who was also kind enough to offer advice on using a one directional print. She’s also made a skirt using Aviary 2 Sparrows in Mustard.

The Versatile Wrap skirt in Aviary 2 fabricsThe Versatile Wrap skirt in Aviary 2 fabrics

Through most of high school I pretty much refused to wear skirts and dresses, I’ve been slowly coming around ever since. It helps that this wrap skirt is too easy to make and really comfy to wear, it works with tights and boots when it’s cool to.

Now that I have the pattern pieces cut it should only take me a couple of hours to whip up this years version, I have some gorgeous Saffron Craig fabric ready to do just that.

My First Quilt – Part 3: Checkerboard Top

With all my strip pairs sewn it was time to turn them into strip blocks. My overall goal was to get a really random spread of the rainbow colours all over the quilt, with out it being overly calculated.

I sorted the colours into groups of dark warms (purples/reds), dark cools (greens/blues/greys) and brights (yellows/oranges/pinks) and then grabbed one from each group for the sets. The dark cools seemed to out number the other groups so I had to swap a few of those in towards the end but it was the first of many exercises in not over thinking things.

A few of the combos really stuck out to me. The worst was a royal blue/gold/dark purple set that screamed school uniforms and football jerseys. The best was a complete accident and I didn’t realise until I was ironing but the colours (navy blue, canary yellow and bright teal green) alternating with white almost exactly match a dress I bought earlier in the year. Not at all the colours I’d usually wear but the set just confirmed how much I like them together.

Strip set that matches my dress!

All the strip blocks were sewn together, and then sliced up again (are you serious!? but I just… ok fine) and arranged into pretty little piles. Once again I had to practice turning my brain off and just grab different strips from different piles while having flashbacks to maths classes on permutations and combinations.

Strip sets for rainbow snapshots quilt

First they were joined back into reasonable size blocks, then laid out on my “design floor” in the order they were made, with the minimum amount of swaps to avoid big clumps of the same colour. A couple black & white snaps to check for value balance, another swap, then back to the sewing machine to sew blocks into rows and rows into… my first quilt top! Ta Da!

The finished quilt top.

Craft Show Catch Up

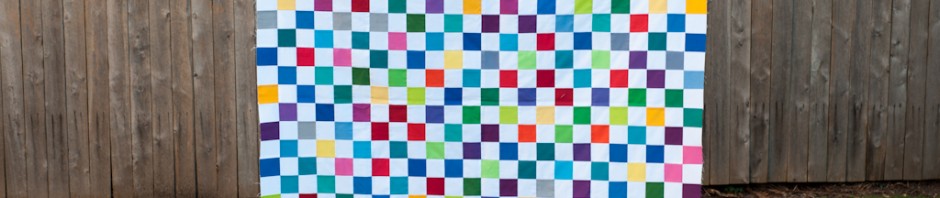
The Sydney Craft and Quilt Fair 2012 has come and gone, it was my third time visiting the show and each year I learn more ways to make the most out of a day there. There’s so much to see and do (and buy) it can be a bit overwhelming but you can only do so much, you just have to work out what you’ll get the most out of. This year I also went to the Craft and Sewing Show at Rosehill Gardens Racecourse, it’s a smaller show so I felt like I got all the way around quite comfortably. If you don’t love huge crowds and getting lost it might be a better alternative if you want to see what a craft show is all about.

For me, the most rewarding part of a show are the hands on workshops. Most go for 1 hour, cost around $15-$25 for a small kit or materials and you get to learn something new with an expert there to help and guide you. There’s plenty of inspiration on offer throughout the various talks, demonstrations and at the stalls, but I always find I’m much more likely to really give something a go when I’ve got someone there to help me through those first steps and I don’t have to think about getting all my bits and pieces organised. I’ve even finished off a few of the small projects that I’ve started at the shows!

Sashiko Sampler Scissor Pouch

Sashiko Sampler Scissor Pouch - FrontSashiko Sampler Scissor Pouch - Back

The kit for this project came from a 1 hour sashiko workshop run by Indigo Niche at the Sydney Craft and Sewing Show back in March. Sashiko is basically a running stitch technique used for hand quilting and embroidery. It comes from Japan and traditionally uses white thread on Indigo fabric.

I enjoyed this workshop so much I also bought a couple of other samplers with the pattern already marked on the fabric, and a beautiful variegated thread to use. I’ll be sure to share some photos once the first piece has progressed a little further.

Felt Applique Needle Book

Felt Applique Needle Book - Marg Low DesignsFelt Applique Needle Book - Marg Low Designs - Inside

This little needle book was from a felt applique workshop with Marg Low of Marg Low Designs. She was absolutely lovely and gave us lots of great tips, by the end of the workshop I had the 3 flower pieces stitched on to the front, and I added the decorative stitches on the inside page on the train home. The next day I stitched on the inside fabric piece which also functioned as the binding, attached the inside felt page and voila!

There were a number of times while making this little needle book that I would pause while getting the next piece of thread ready and think, “Now where should I put my needle so I don’t lose it?” Duh… in the needle book perhaps? Handy little things they are, and super cute with a little felt applique.

English Paper Piecing

English Paper Pieced Hexagons

I’ve heard a lot about paper piecing so thought I’d find out how it works. This workshop by Blue Willow Cottage was a great introduction to hexagons, and the kit provided the fabric scraps and 7 pre-cut papers (enough to make a flower) as well as a template for cutting the fabric hexagons and the cutest little cutting mat (3″ square) and mini rotary cutter. As with all the workshops it was a great little taster to learn the basics and get me interested in trying some more.

I’m not sure what I’ll do with these when I’ve got all 6 petals on my flower finished but it will probably be appliqued onto a background fabric to then use.

So that’s my craft show catchup, there are actually more little demo projects from the Quilt and Craft Fair, but I’ll spare you for the time being and save those for another time. If you get the chance to go to a craft or sewing show be sure to check out the website or brochures before you go to see what demonstrations and workshops are on offer and GET IN EARLY to book as I’ve found the workshops fill up really quickly. You’ll have to race me though!

Phoebe & Phoebe

Phoebe & Phoebe - Elephant Softies

It’s about time I introduce Phoebe & Phoebe. These gorgeous elephant softies were made using the “Phoebe” pattern from Melly & Me.

I’d seen a few good reviews and great results from these patterns, the softies look really impressive! I was feeling quite intimidated initially but wanted to give one a go so chose the elephant as I thought the few large pieces would hopefully be a bit easier to manage than a lot of small fiddly bits.

Phoebe & Phoebe - Elephant Softies

These two were made for my nieces for Christmas (yes it’s taken me some time to post about them). The fabrics are from the Hoopla for Moda range that I picked up, along with the pattern, from Kelani Fabric. Niece #2 was born in the days leading up to Christmas, we didn’t know she was going to be a girl so I had the ears sewn on to both elephants, and was waiting for the news before sewing the blankets on. Had she been a boy they would have gone the other way around but the plan for two girls was to mix them up. They also have their initials embroidered into the inner side of a leg to save any fights in future about whose was whose.

The pattern requires a mix of machine and hand sewing, and I chose to blanket stitch around the applique felt toes and eyes by hand using 2 strands of embroidery cotton. There were a couple parts that I found a bit tricky or would do a bit differently next time…

  • I found there were some seams that could have been a little wider or used a bit of reinforcement, particularly the curves between the front and back legs on each side and the front and back where four seams met.
  • I may have done something not quite right but the plaited felt tails aren’t particularly strong, which I found out when my two year old niece used it for carrying around her elephant (as you do when you’re two) and it didn’t last long – hers now has an adorable stubby tail.

Phoebe & Phoebe - Elephant Softies

Overall I absolutely adore these softies, and have had many kind comments about them. I’ll definitely use this pattern again in future (in fact I have just made another one which I’ll be sharing) and would love to try some of the other patterens by Melly & Me, perhaps Bubbles the Unicorn, Dawn the Deer Foal or Mrs. Perkins the Giraffe, to name a few.

Zippers for Bags Class with Nicole Mallalieu

Nicole Mallalieu & I

Earlier this week I was lucky enough to take part in a day class with the Queen of Bag Making (amongst many other things), Nicole Mallelieu from You Sew Girl!

First up, a huge thank you must go out to the team at Peg’s Pieces in Kirrawee for organising Nicole’s visit, especially our host Bernadette who was also our fabulous “gofer”, tea lady and colour matching assistant all day for us.

Zips really don’t have to be that scary, it can seem that way if you’ve never been shown how to sew one in but as Nicole said, “it’s only fabric and haberdashery”. I was shown during a lesson after buying my sewing machine, and there are plenty of great tutorials out there for little zipper pouches that are great practice. Having had that bit of practice behind me I wanted to see how to go about using them in a bag, I love bags with lots of pockets for organising things.

The Zippers for Bags class was perfect as it focused on the different options for using zippers to customise and add pockets to a bag. We got all the way through making two of the options for our bags, with great notes for a few other options as well. The rest of the bag is still to come but when it’s done there will be pockets for everything! Almost.

TopstitchingZipper bag gusset

It was an incredible day, and absolutely exhausting jamming all those great tips and ideas into my head before driving home in the wind and rain but I loved every minute and would jump at the chance to take more classes with Nicole. Sounds like great excuse for a trip to Melbourne.

In preparation for the class there were a few things I needed to get my hands on. Things I’d never used before but are surely going to become two of my favourite new toys:

Vliesofix T 6 – this is a roll of thin (6mm) fusbile tape with paper on one side so you can iron to one piece of fabric, rough side down, then rip off the paper and iron to the other side. It’s really handy instead of trying to use pins for holding together little fiddly edges and small pieces before stitching, I’d run out of fingers trying to count how many times “Vliesofix it!” was called out during the day. I found mine in Spotlight (last box!) but it was also available at Peg’s Pieces, and hopefully somewhere near you.

Vilene S320 – This is an amazing fusible non-woven interfacing, when ironed on to the back of fabric it adds support and helps improve accuracy for beautiful crisp edges and corners. It was a little tricky to find and nearly all references to it online were from the You Sew Girl site and blog. So where can you buy S320? I got mine before the class from Voodoo Rabbit who stock a great range of You Sew Girl products in their online store. Peg’s Pieces also had it available along with other You Sew Girl items and recommendations, both stores are super friendly and helpful if you’re after anything to help you make beautiful bags.

If you’ve ever wanted to try making your own bag or purse keep an eye out and if Nicole Mallalieu is ever doing a class near you, jump on it! If you can’t make it to a class, try one of her patterns or kits, they come with really detailed instructions that are almost as good as having her there to help you out.

Interfacing
Zipper Gusset

crafty distractions